
Reimagined History: A Gel Plate Portrait Project

Introduction
Gel plate printing is a unique and exciting way to transform ordinary images into extraordinary works of art. In this tutorial, I'll guide you through the process of creating a mixed-media portrait using open-access images from the Smithsonian and a gel plate. Let's bring history to life through the magic of art!

Finding Inspiration
The journey begins at the Smithsonian Open Access website (si.edu/openaccess), a treasure trove of images ripe for artistic exploration. For this project, I'll focus on a portrait of Henry Ulke and several patterns suitable for mimicking fabric and wallpaper, which will also work well in high-contrast black and white. The beauty of using open-access images lies in their freedom from copyright restrictions, allowing for unrestricted creative use.
Preparing Your Images
Before diving into the printing process, you'll need to prepare your images. This involves converting the chosen portrait into a halftone pattern using image editing software. Additionally, prepare the background patterns by adjusting levels and contrast to ensure optimal transfer to the gel plate.
A quick tip: Laserjet printers are essential for this project as their toner-based ink resists the paint, allowing the image to transfer cleanly.
For a detailed breakdown of the image preparation process, including specific software settings and techniques, check out the full tutorial on YouTube.

Building Henry's Outfit
To add a unique touch to my historical portrait, I'll create a custom outfit for Henry using a combination of stencils and patterned laser prints. To create the stencils, print out a clear copy of Henry's portrait and trace out the basic shapes of his ensemble. Then cut out individual pieces representing different parts of the outfit, such as the lapels, vest, tie, and collar. Enlarge these pieces slightly to create a stencil with a area of overlap. Next, select laser-printed patterns that complement the overall aesthetic of the portrait. Place the cut-out stencils on top of the patterned paper and carefully cut out the corresponding shapes. Finally, arrange the patterned paper pieces on top of the printed half-tone portrait to create the desired outfit design. Consider overlapping pieces to create depth and visual interest. Secure the pieces in place with glue. You can use heavy pen pressure and oil pastels to create even more textures, like pinstripes and polka dots.
Adding Personal Touches
I did a little research into Henry's life and discovered a fascinating story. To pay homage to his accomplishments, I incorporated lapel pins. Flair! These small additions breathe life into the portrait and connect you to the subject on a playful level.
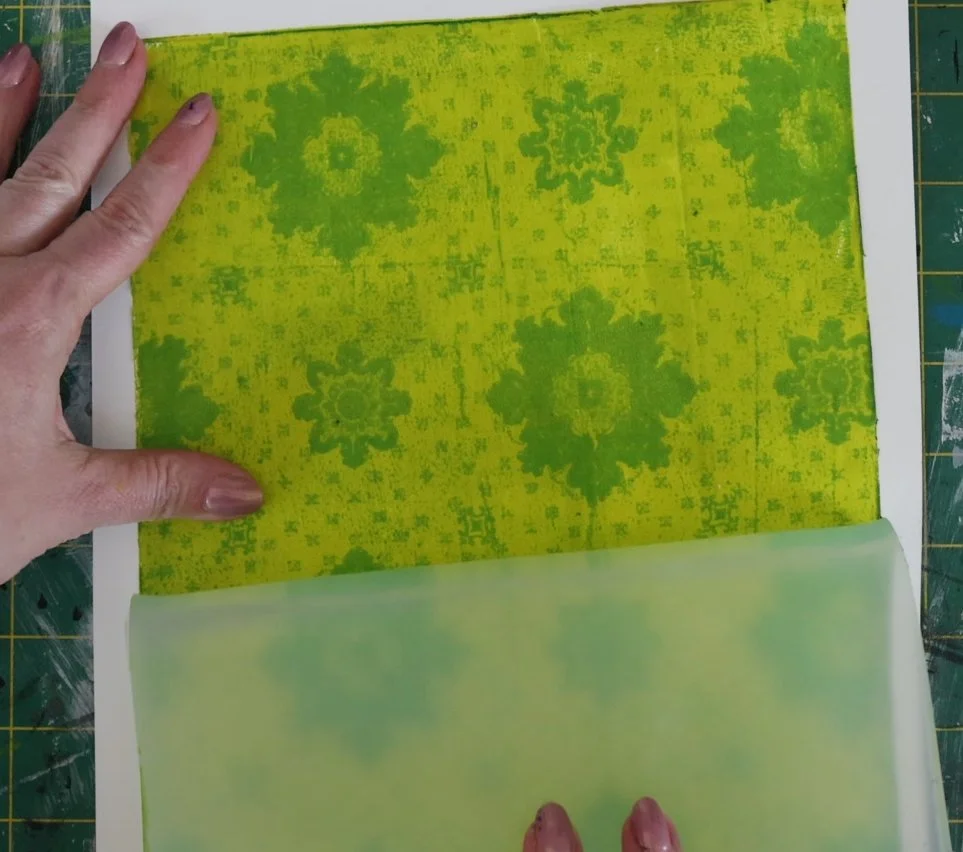
Creating a Dynamic Background
To create a vibrant and textured background, I employed a two-step process. First, I used a LaserJet print of a ceiling paper pattern as a base. This technique, known as LaserJet image transfer, involves placing the LaserJet printout onto the gel plate, which is covered in a layer of paint. The toner on the printout acts as a resist, preventing the paint from adhering to those areas, and leaves the ceiling paper pattern behind on the plate. By choosing this pattern, I introduced a repeating element to the background reminiscent of wallpaper.
To add depth and visual interest, I overlaid a second layer of a lighter green acrylic paint and then placed the art paper onto it. This layering technique created a dynamic, aged and visually appealing background for the portrait, that blends new and old.
Transferring the Assembled Henry
To transfer your assembled Henry collage to the gel plate, start by applying a thin, even layer of black acrylic paint (U used Liquitex Mars Black) to the gel plate. Quickly and carefully place your Henry collage face down onto the painted gel plate, applying gentle pressure for a few seconds to ensure good contact. Carefully lift the collage, revealing the transferred image of Henry. Allow the transferred image to dry completely before proceeding to the next step.
Reverse Painting
To begin the reverse painting process, apply a thin layer of matte gel medium to the transferred image. Allow it to dry completely. This step is beneficial as it prevents the acrylic paint from beading up on the surface, ensuring a smooth and even application.

The paint on the left has no gel medium under it, whereas the swatch on the right does and goes onto the gel plate without beading up.
When choosing colors, select a base hue and then create lighter and darker variations for depth and dimension. Instead of applying solid blocks of color, focus on intuitive brushstrokes to add expression and character to the image. Remember to paint from front to back, layering colors to create a sense of depth. For example, start with the lapel pins, then move on to the lapels, and finally the jacket. As you paint, consider where to add subtle shadows and highlights to enhance the three-dimensional effect.
Tip: To monitor your progress, place the gel plate on a piece of plexiglass, allowing you to flip it over easily to view your progress. Take your time and enjoy this creative process.

Pulling Up the Final Image
To adhere Henry to the background, generously apply matte gel medium to the entire (dried) surface of the gel plate. Carefully position the plate down onto the prepared green background, ensuring proper alignment. Use plexiglass to assist with precision. To secure Henry in place and ensure complete adhesion, place a heavy book on top and allow the assembly to dry overnight.
It's crucial to apply a generous amount of gel medium to create a strong bond between Henry and the background. The gel medium acts as an adhesive, connecting all layers together. Allow ample drying time between layers to prevent lifting or smudging.
Once the assembly has dried completely, carefully peel back the paper from Henry's image. With proper preparation and drying time, the entire image should lift cleanly without any issues.
Conclusion
By taking advantage of open-access images, and combining it with gel plate printing, you've can transform a historical portrait into a contemporary work of art. And also blend new and old with bold color choices. This project demonstrates the endless possibilities that await when you explore the world of mixed media and digital art.
You're encouraged to embark on your own artistic journey using the Smithsonian Open Access images and the gel plate printing technique. And if you try out this technique and share it to social media, tag me. I love it when people explore the process. Social media links are in the footer.

There is an 11 minute video of this entire process on YouTube! Follow me for more Gel Plate tutorials.